Well my mind is anyway, going by what I have made this week. Now that I've finished the first draft of The Ghost Lights I've had more time to concentrate on my papercraft. I'm still a little bit off my game with the stitching at the moment, but it happens sometimes. With any luck I'll at least finish this page before I'm back to the Disney stitch.
Anyway, first thing's first. Decluttering. Here are this week's items.

A Ghost Moonlight perfume sampler. It was alright, but not one I'd buy. To be honest I prefer samplers in a spray bottle because it's too easy to tip the contents out completely. Bin.


A mini Disney tree tube. You'll see from the second photo what colour it originally was. For some reason spending time in the window has made it go all Steamboat Willy. Don't need it, so bin.

A Hogwarts seal and stamp kit. Got this in Florida, never used it. It's being regifted.

Same thing here, but it's a Hogwarts briefcase with stationary and envelopes inside. Regifted.

Washi tape. This was a gift from a friend but it's not my style, so it's going to charity.

A 2000 Disney plush toy (Donald is the new year, Goofy is father time etc) When I went to Disney the second time I made goody bags for everyone, including myself, and this is the plush figure I bought. It's time it went to a charity shop.

An Oz figure. Interesting thing about this is it's in a Giles box. Sealed inside so it's a factory error. Given this to my brother.
Now onto the makes!
First thing I made was an altered notebook. I learned from the last one. I started it off by painting in white gesso, then added tissue paper. When that was all dried I used peeled paint ink and a stencil to add colour to the outside, then used texture paste with a flower stencil. When that was dry, I painted it with yellow mica powder. I stamped a collage image onto card a few times, vintage inked the first one, then cut out select pieces and inked them, using foam pads to give it a dimensional look. Finally I cut out some tiny tattered florals (found out my card is too thick for the quilling tool so rolled them by hand) and some leaves, and added a word circle (not sure what they're actually called!)


Jewellry next.

A pair of earrings, using the last of the green beads, a couple of watermelon slices, and a couple of leaves.

Earrings, with large square beads and a pineapple. They go with the necklace below, which also has the turtle attached.


A pair of earring pins, taken directly from the tutorial on Crafty Creatives.
 Finally, I glued two flowers together, and used a facet with Steampunk Spells paper, to make a keyring.
Next, a tag. I started off by inking a tag with various colours, then added versamark through the shattered stencil, and added clear embossing powder. I heated that then used a darker ink in the cracks to highlight the spiders web. I got some ephemera, inked them, and put them on the tag, as well as some grungeboard pieces. The oval was sprayed, the key brushed with mica powder, the skull inked with black soot and the crown embossed. I sprayed a ribbon with lime spray, and stencilled 31 on the tag, adding distress embossing powder.


Finally, my favourite make of the week! I got a Lindy's stamp gang set this week from Create and Craft, after getting a voucher for £10 off. The set was Industrial Chic, and had sprays, magicals (like mica powder) and embossing powder. I'm already obsessed with these, and have more on my wishlist.
I had a little metal circle, once part of a clock, and really wanted to do something off beat with it. I started off by using texture paste through a stencil on the sides, adding some little beads, and painting with white gesso. I then used a micture of sprays and magicals to get the colour I wanted. I cut a cardboard circle to fit the back, and covered it with paper from G45 Voyage beneath the sea. I fussy cut a diver, some fish and a couple of star fish to use, then sprayed some paper with the Industrial chic sprays and used a greenery die and the bubble die from the Mixed Media thinlit die. I also noticed when I was making the notebook the other day that some of the flowers make perfect seaweed blooms, so did some of them too. On the circle I put the diver, some seaweed, and some fish. I also added some bubbles, which were the little bits from the bubble die that I added glossy accents to. I glued some seaweed, and some little shells I got from the Isle of Wight on the inside, then on the outside I added the biggest seaweed bloom, the bubble paper, the greenery, a couple more fish and the starfish. Finally I used some embossing powder on two wooden pieces (a sand dollar and another flower) and added them to the bubble paper.


I love this! Possibly the best piece I've made, at least for a long time.
Hope you've enjoyed today's post, and maybe it'll inspire you to do some crafting of your own.
Happy crafting!
Ems
Anyway, first thing's first. Decluttering. Here are this week's items.
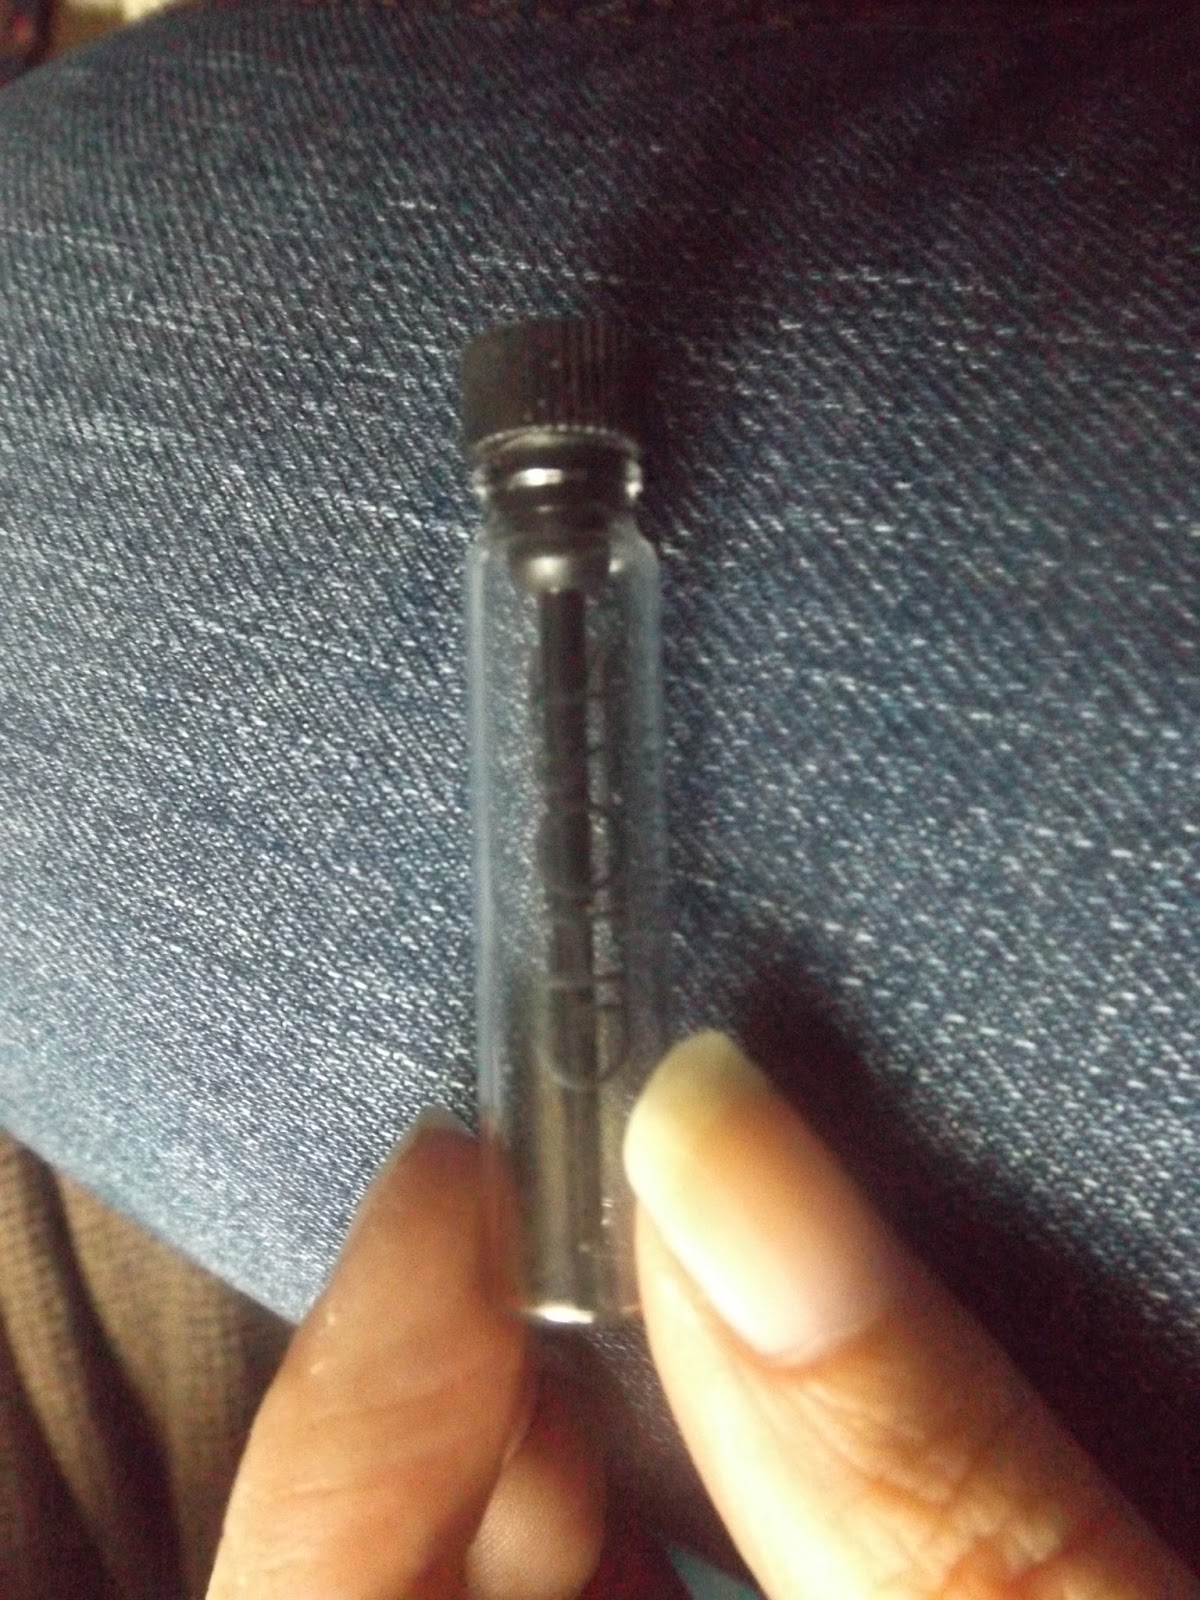
A Ghost Moonlight perfume sampler. It was alright, but not one I'd buy. To be honest I prefer samplers in a spray bottle because it's too easy to tip the contents out completely. Bin.


A mini Disney tree tube. You'll see from the second photo what colour it originally was. For some reason spending time in the window has made it go all Steamboat Willy. Don't need it, so bin.

A Hogwarts seal and stamp kit. Got this in Florida, never used it. It's being regifted.

Same thing here, but it's a Hogwarts briefcase with stationary and envelopes inside. Regifted.

Washi tape. This was a gift from a friend but it's not my style, so it's going to charity.

A 2000 Disney plush toy (Donald is the new year, Goofy is father time etc) When I went to Disney the second time I made goody bags for everyone, including myself, and this is the plush figure I bought. It's time it went to a charity shop.

An Oz figure. Interesting thing about this is it's in a Giles box. Sealed inside so it's a factory error. Given this to my brother.
Now onto the makes!
First thing I made was an altered notebook. I learned from the last one. I started it off by painting in white gesso, then added tissue paper. When that was all dried I used peeled paint ink and a stencil to add colour to the outside, then used texture paste with a flower stencil. When that was dry, I painted it with yellow mica powder. I stamped a collage image onto card a few times, vintage inked the first one, then cut out select pieces and inked them, using foam pads to give it a dimensional look. Finally I cut out some tiny tattered florals (found out my card is too thick for the quilling tool so rolled them by hand) and some leaves, and added a word circle (not sure what they're actually called!)


Jewellry next.

A pair of earrings, using the last of the green beads, a couple of watermelon slices, and a couple of leaves.

Earrings, with large square beads and a pineapple. They go with the necklace below, which also has the turtle attached.


A pair of earring pins, taken directly from the tutorial on Crafty Creatives.

Next, a tag. I started off by inking a tag with various colours, then added versamark through the shattered stencil, and added clear embossing powder. I heated that then used a darker ink in the cracks to highlight the spiders web. I got some ephemera, inked them, and put them on the tag, as well as some grungeboard pieces. The oval was sprayed, the key brushed with mica powder, the skull inked with black soot and the crown embossed. I sprayed a ribbon with lime spray, and stencilled 31 on the tag, adding distress embossing powder.


Finally, my favourite make of the week! I got a Lindy's stamp gang set this week from Create and Craft, after getting a voucher for £10 off. The set was Industrial Chic, and had sprays, magicals (like mica powder) and embossing powder. I'm already obsessed with these, and have more on my wishlist.
I had a little metal circle, once part of a clock, and really wanted to do something off beat with it. I started off by using texture paste through a stencil on the sides, adding some little beads, and painting with white gesso. I then used a micture of sprays and magicals to get the colour I wanted. I cut a cardboard circle to fit the back, and covered it with paper from G45 Voyage beneath the sea. I fussy cut a diver, some fish and a couple of star fish to use, then sprayed some paper with the Industrial chic sprays and used a greenery die and the bubble die from the Mixed Media thinlit die. I also noticed when I was making the notebook the other day that some of the flowers make perfect seaweed blooms, so did some of them too. On the circle I put the diver, some seaweed, and some fish. I also added some bubbles, which were the little bits from the bubble die that I added glossy accents to. I glued some seaweed, and some little shells I got from the Isle of Wight on the inside, then on the outside I added the biggest seaweed bloom, the bubble paper, the greenery, a couple more fish and the starfish. Finally I used some embossing powder on two wooden pieces (a sand dollar and another flower) and added them to the bubble paper.


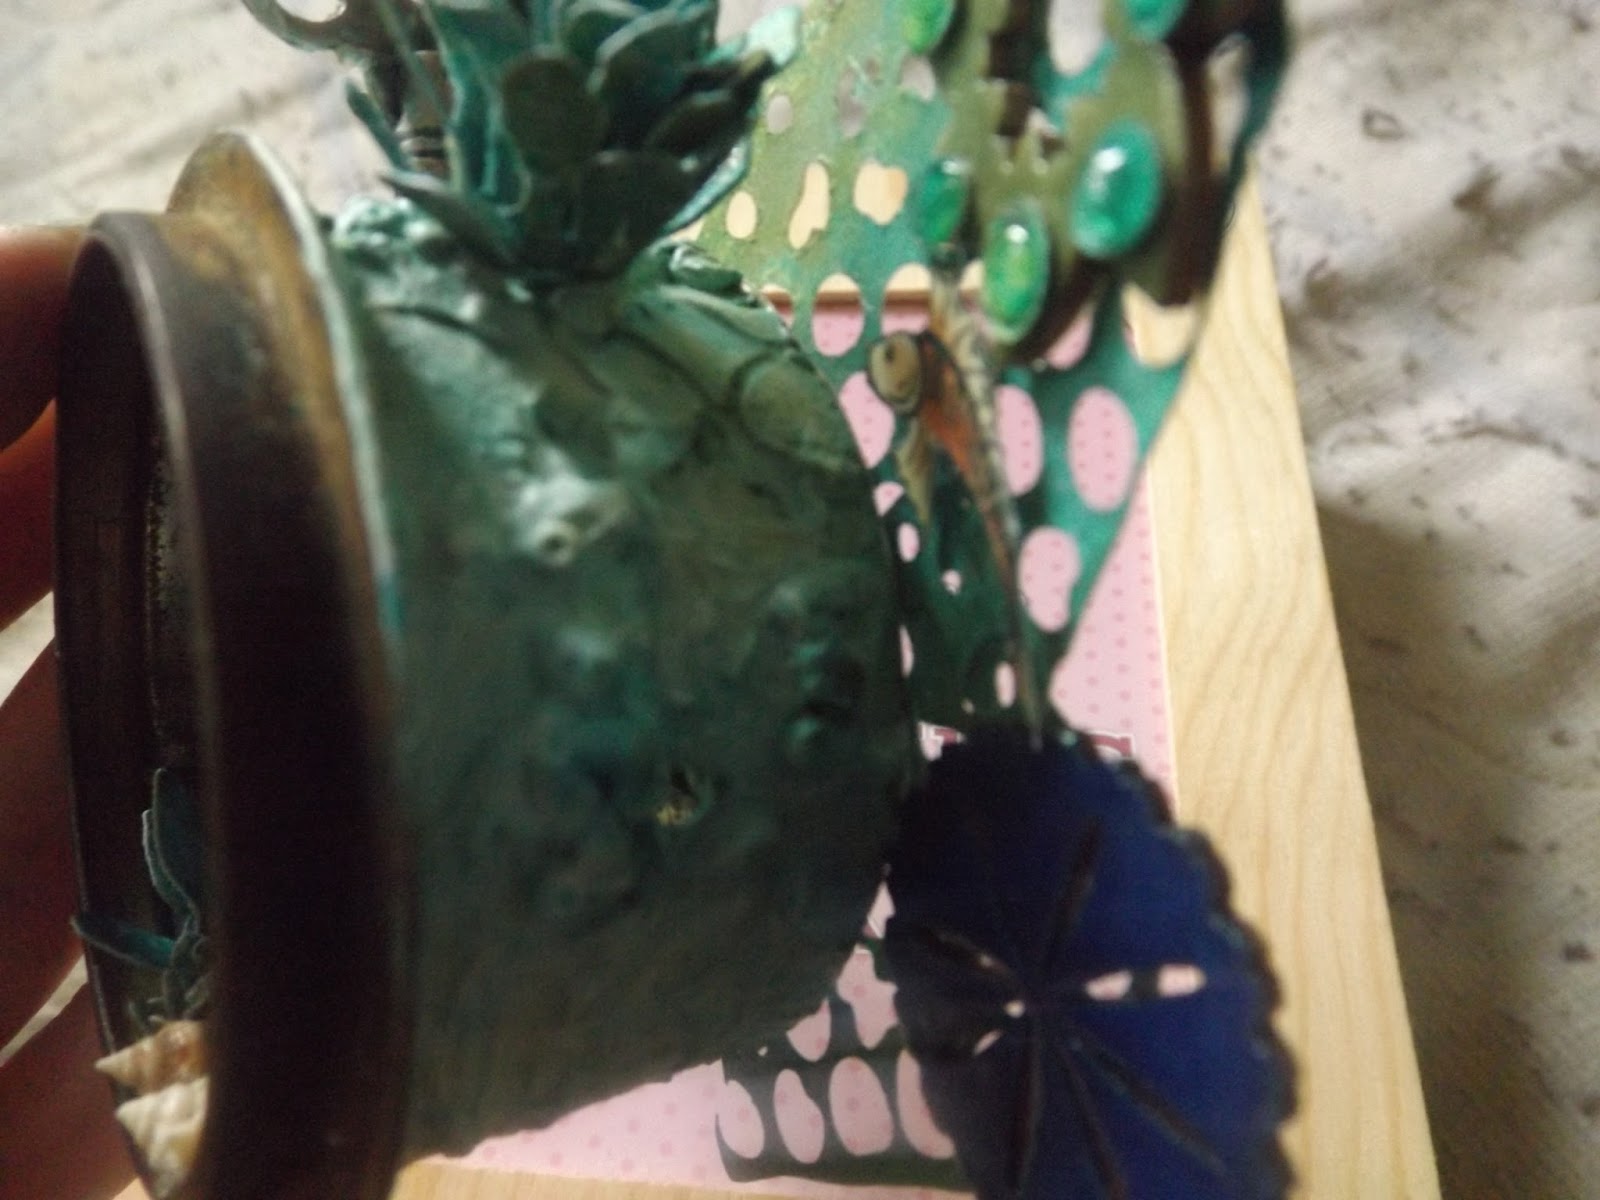


I love this! Possibly the best piece I've made, at least for a long time.
Hope you've enjoyed today's post, and maybe it'll inspire you to do some crafting of your own.
Happy crafting!
Ems
Very creative , amazing art work xxx
ReplyDeleteThank you Patricia :)
DeleteFound your blog via the Setcraft FB page. Loving your decluttering exercise as much as the crafting. Both have given me inspiration. Will follow your blog with interest.
ReplyDeleteJean
Thank you Jean :) The decluttering is a necessity I'm afraid, else I'll end up buried under my own hoard! I find one item a day is manageable, as it means it doesn't overwhelm me.
Delete